CHAIR HOW-TO: Subject Areas
OVERVIEW
Subject areas can be used in both single-track and multiple-track conferences for:
- Classifying and grouping papers
- Specifying areas of expertise for Reviewers
- As a criterion for paper assignment.
Conferences can have two level hierarchical subject areas when Chairs add a child to an existing subject area. A single-parent subject area can have many child subject areas.
Important to know
Important
Only one primary subject area can be selected by a user in any configuration. It is contingent upon the settings if the user's primary subject area can be a parent or a child.
If subject areas are configured, authors will need to select one primary subject. Authors could optionally select multiple secondary subject areas (the limit can be configured by the Chairs). There are no separate lists for primary and secondary subject areas, i.e. authors will be selecting from the same list of subject areas configured by the Chairs.
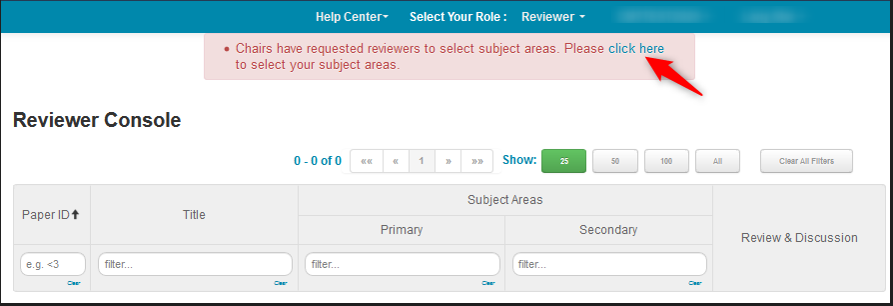
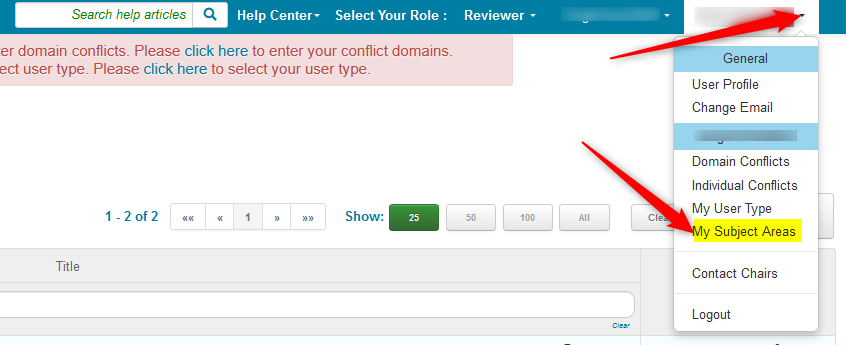
If the Reviewer settings have the 'Require reviewers to select subject area’ checkbox enabled, when they login to CMT, they will see a red bar at the top of the page to enter Subject Areas. If subject areas are configured for multiple tracks, reviewers need to enter separately for each track. After they enter their Subject Areas, they can edit them by using the drop-down menu next to their name on the upper right corner.
Submission Setting Behavior
Important
The secondary subject area limits only applies to the paper submission.
CMT does not limit a reviewer's secondary subject area selection.
If Submission setting ‘Allow secondary subject area selection’ is ENABLED and ‘Limit the number of selected secondary subject areas’ to ZERO (ENABLED), the behavior is:
• Reviewers can select one primary plus any number of secondary SAs.
• Authors can select only one primary – no secondary SAs.
If Submission setting ‘Allow secondary subject area selection’ is DISABLED, then the behavior is:
• Reviewers can select only one primary – no secondary SAs.
• Authors can select only one primary – no secondary SAs.
‘Relevance’ represents how closely subject areas of a paper match that of a reviewer. Chairs can use ‘Relevance’ to assign papers to reviewers who have the required expertise.
‘Relevance’ can be used during automatic assignment. During bidding, Reviewers can sort papers based on ‘Relevance’ to find papers on which they would like to bid.
SUBJECT AREA SETTINGS IN VARIOUS PAGES
There are different pages that must be configured for certain settings for Subject Areas.
The Subject Area page. This is where the parent (and child) Subject Areas are created for the conference.
The Submission page. This is where Subject Area choices are configured for users (Authors and PC).
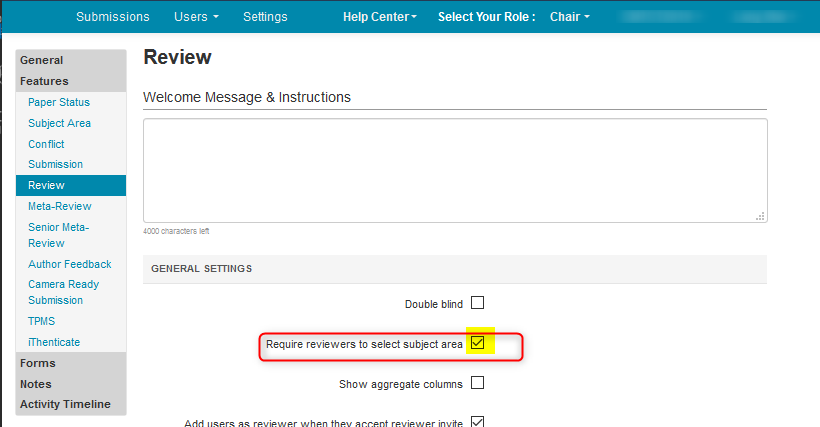
The Review settings page. It is here you would enable the setting to require reviewers to pick their Subject Areas.
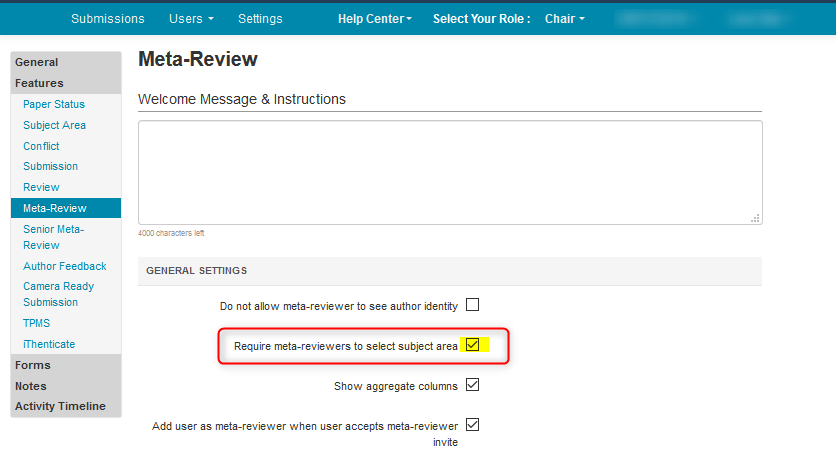
The Meta-Review settings page. It is here you would enable the setting to require meta-reviewers to pick their Subject Areas.
The Senior Meta-Reviewer settings page. It is here you would enable the setting to require senior meta-reviewers to pick their Subject Areas.
EXPLAINING THE DIFFERENCE BETWEEN PARENT/CHILD AND PRIMARY/SECONDARY
The designation of parent and child are the subject areas themselves. The parent would be a main topic with the subsequent children as a more granular set related to the main or parent subject area.
A primary subject area is what the user picks as their main focus of expertise.
Then, depending upon how the settings are configured, they can pick secondary subject areas that may or may not be related to their primary pick. (The secondary subject area pertains to another set of skills or expertise the user may have that may be pertinent to paper matching.)
They may also be able to pick a child subject area as a primary and a parent subject area as a secondary (again depending upon configuration of the settings as described below).
SUBJECT AREA SETTINGS TAB
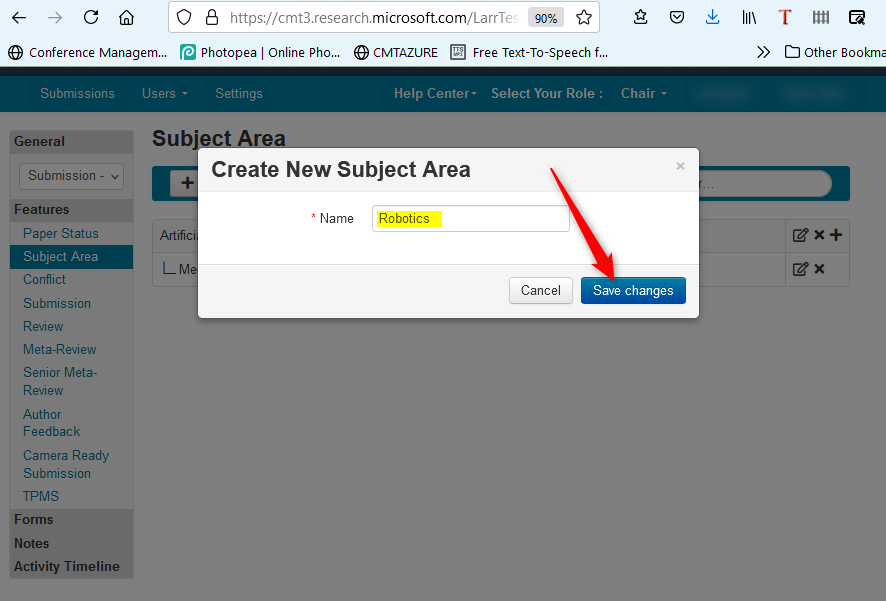
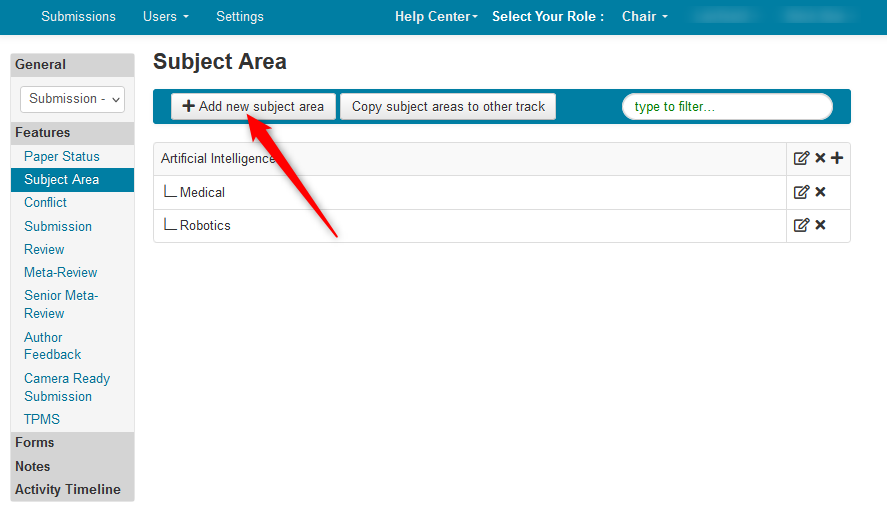
- Go to ‘Features>Subject Area,’ click ‘+ Add new subject area.’
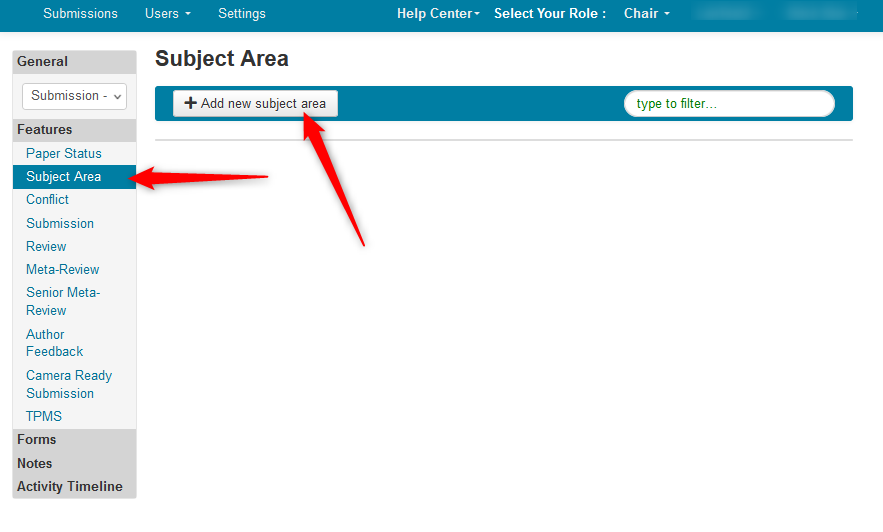
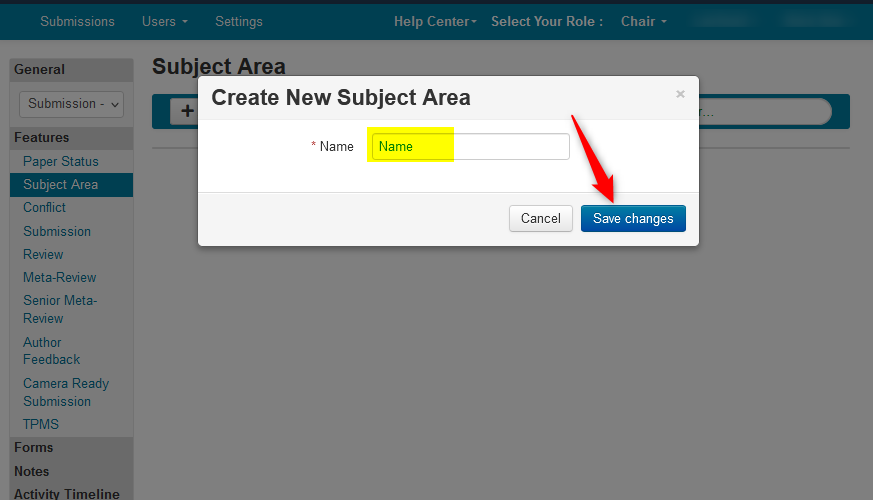
- In the ensuing popup, enter the name of the Subject Area. This will be the parent Subject Area. Click ‘Save changes.’
Note
When entering a name, do not use any icons or bullets. Only use text.
- To add a child subject area, click the ‘+’ on the end of the row of the parent subject area.
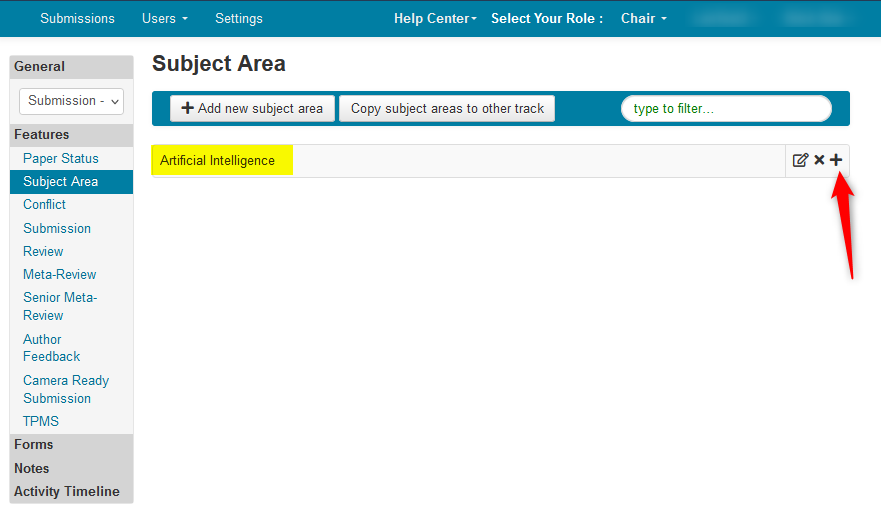
- Enter the name of the child subject area and click ‘Save changes.’

- To add another child, click on the ‘+’ of the parent subject area again.
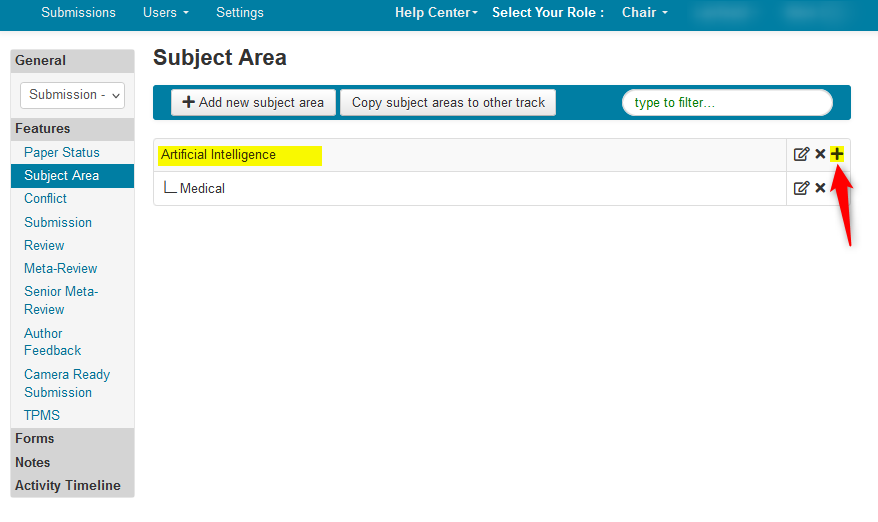
- Enter the child subject and click ‘Save changes.’
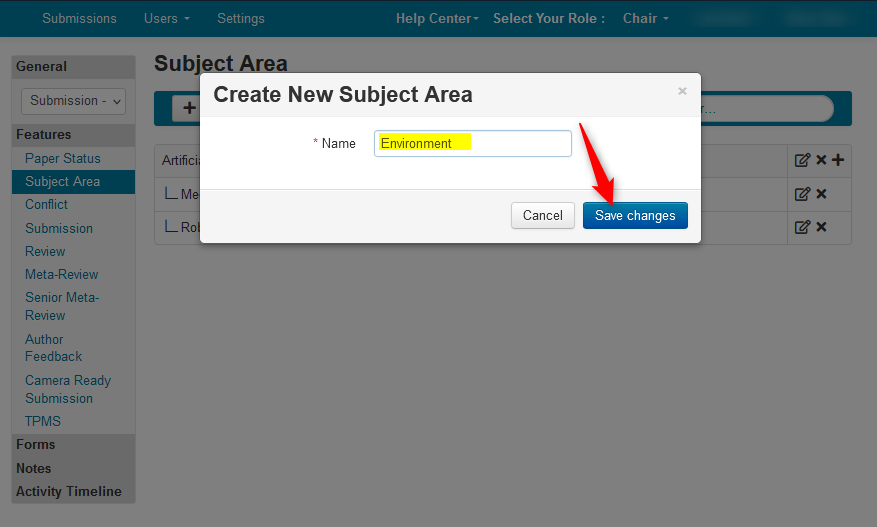
- To add another parent subject, just click the ‘+Add new subject area’ button.
- Enter the name and save the changes.
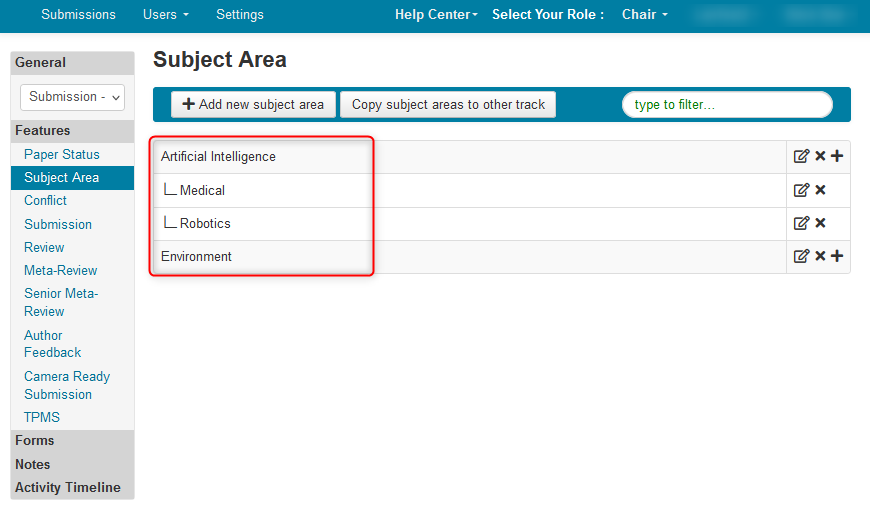
- Verify your Subject Areas are correct
COPY SUBJECT AREAS TO ANOTHER TRACK
If the conference is a multi-track conference, the Subject Areas may need to be copied over from one track to the next for consistency.
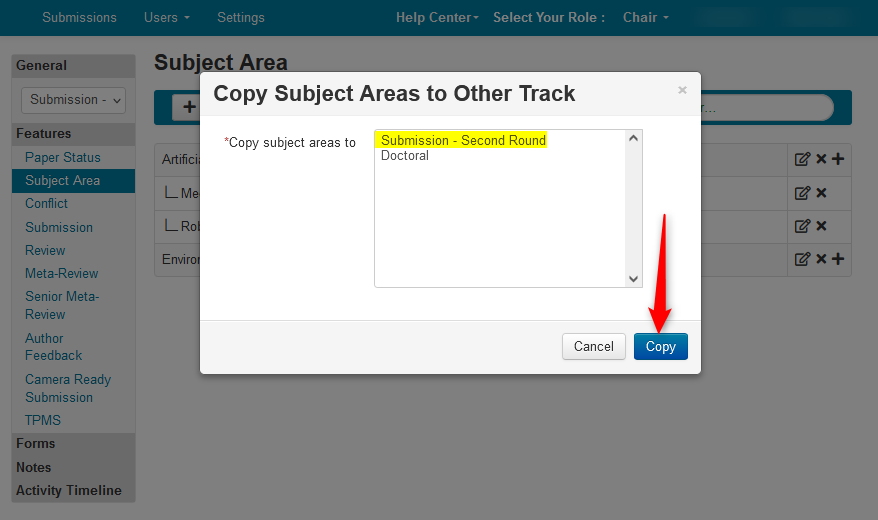
- In the Track with the newly created Subject Areas, click 'Copy subject areas to other track'

Highlight the track or tracks to which the Subject Areas are to be added. In this case we chose only the 'Submission - Second Round' track. To highlight more, simply [CTRL] click on the tracks desired.
Click 'Copy'
Important
Do not click 'Copy' more than once or the Subject Areas will be added to the new track again, thus doubling them.
SUBMISSION SETTINGS TAB
Important
Only one primary subject area can be selected by a user in any configuration. It is contingent upon the settings if the user's primary subject area can be a parent or a child.
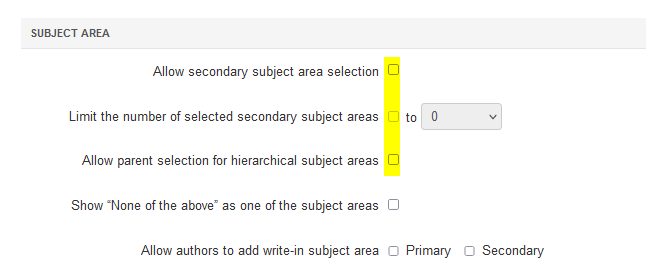
There are five main settings for subject areas:
- Allow secondary subject area selection
- Limit the number of selected secondary subject areas
- Allow parent selection for hierarchical subject areas
- Show “None of the above” as one of the subject areas
- Allow authors to add write-in subject area
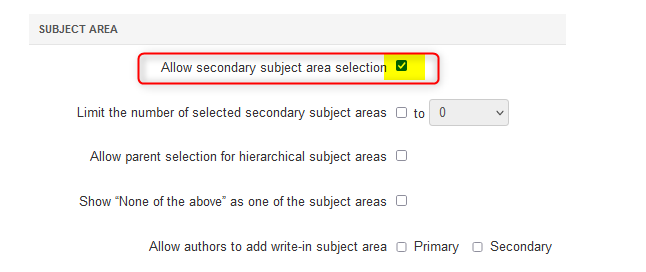
Allow secondary subject area selection
Enable this if users are to select secondary subject areas. If this is the only setting enabled, the users will have unlimited secondary choices.
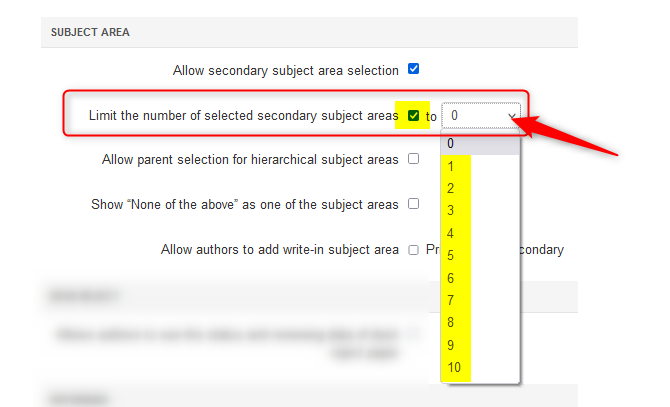
Limit the number of selected secondary subject areas
Important
The secondary subject area limits only applies to the paper submission.
CMT does not limit a reviewer's subject area selection.
To limit the amount of secondary choices of subject areas, enable this checkbox and use the drop down to select the number (0-10).
Note
The 'Allow secondary subject area selection' setting has to be enabled for the limit to be able to be selected. If 'Allow secondary subject area selection' setting is enabled and the the limit selection is disabled, the users will have unlimited secondary choices.
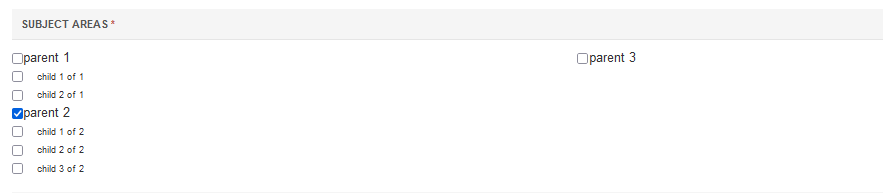
Allow parent selection for hierarchical subject areas
Enabling this will allow selection of the parent as the subject area.
Note
Different combinations of settings will affect a user's subject area selection.
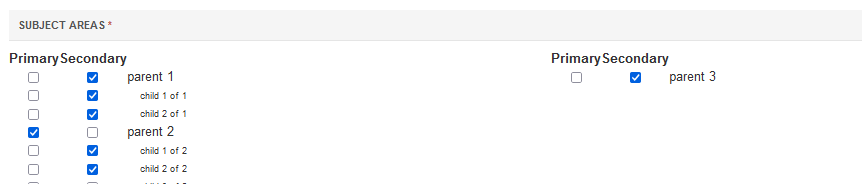
COMBINATION 1
- Allow secondary subject area selection = ENABLED
- Limit the number of selected secondary subject areas = DISABLED
- Allow parent selection for hierarchical subject areas = ENABLED
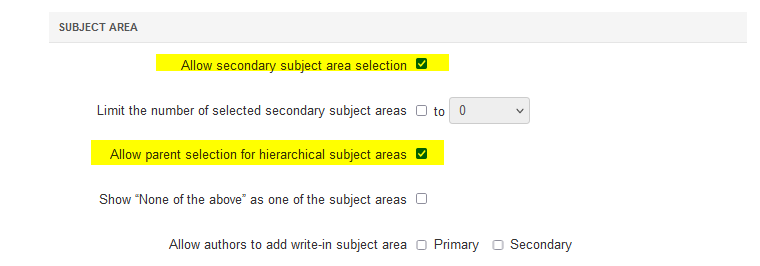
The Submission form will show a Parent can be selected as a primary or secondary subject area, as well as any number of secondary subject areas.
Note
Only one primary subject area can be selected.
COMBINATION 2
- Allow secondary subject area selection = DISABLED
- Limit the number of selected secondary subject areas = DISABLED
- Allow parent selection for hierarchical subject areas = ENABLED
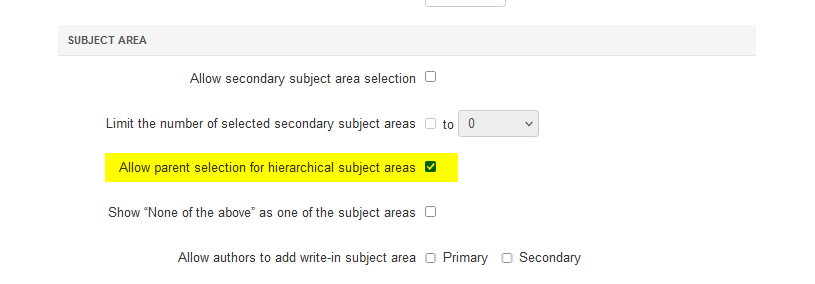
The Submission form will show only primary subject areas can be selected, and the Parent can be one of those choices.
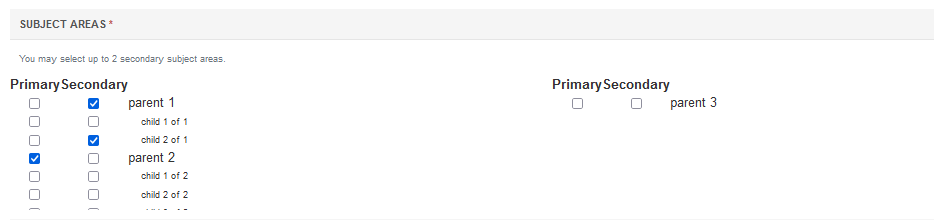
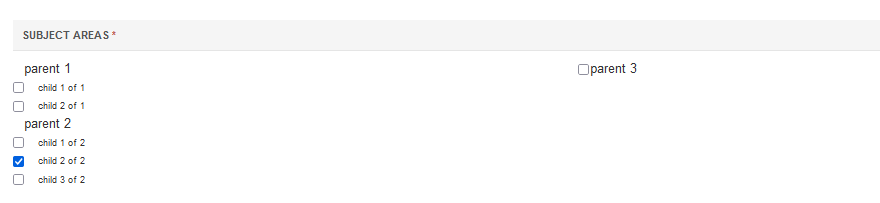
COMBINATION 3
- Allow secondary subject area selection = ENABLED
- Limit the number of selected secondary subject areas to 2 = ENABLED
- Allow parent selection for hierarchical subject areas = ENABLED

The Submission form will show the primary selection can be a Parent and the two secondary selections can be either Parent or child.
COMBINATION 4
- Allow secondary subject area selection = DISABLED
- Limit the number of selected secondary subject areas = DISABLED
- Allow parent selection for hierarchical subject areas = DISABLED
The Submission form will show the only subject area that can be selected is a child. This will be the primary subject area. No other selection can be made.
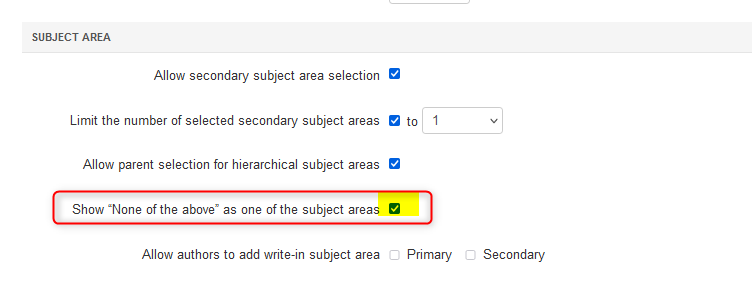
Show “None of the above” as one of the subject areas
Enabling this will allow users to select "None of the above" if they feel that the subject areas are not in their expertise.
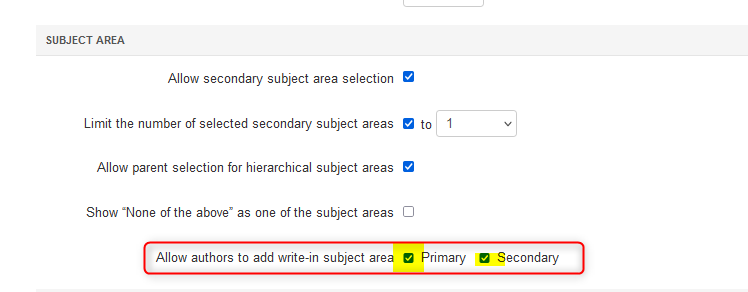
Allow authors to add write-in subject area
Enabling this will allow authors to write in their own primary and/or secondary selections.
Note
The 'Show “None of the above” as one of the subject areas' setting has to be disabled for the author write-in setting is to be able to be selected.
- When all settings are selected, clcik 'Save changes.'

REVIEW SETTINGS TAB
- Go to Features>Review, enable the ‘Require reviewers to select subject area’ checkbox. Save changes.
META-REVIEW SETTINGS TAB
- If desired, the same can be done for the Meta-Reviewers. Go to Features>Meta-Review, enable the ‘Require meta-reviewers to select subject area’ checkbox. Save changes.
REVIEWER CONSOLE
REVIEWER ENTERS SUBJECT AREAS
When the Reviewers log in, they will see the alert to select their subject areas.
- Reviewers use the link 'click here' to enter their Subject Areas
REVIEWER EDITS SUBJECT AREAS
- If the Reviewer needs to edit their subject areas, they click on their name dropdown and select Subject Areas.
BULK IMPORTING CSV FILE
Create a ticket from Help Center to have your CSV file imported into your conference.
Please ensure the file is in the format below:
- One level of Subject Areas (one column)
Area 1
Area 2
Area 3
- Two-levels of Subject Areas (two columns)
Parent 1 Area 1
Parent 1 Area 2
Parent 1 Area 3
Parent 2 Area 4
Parent 2 Area 5
MANAGE REVIEWERS PAGE
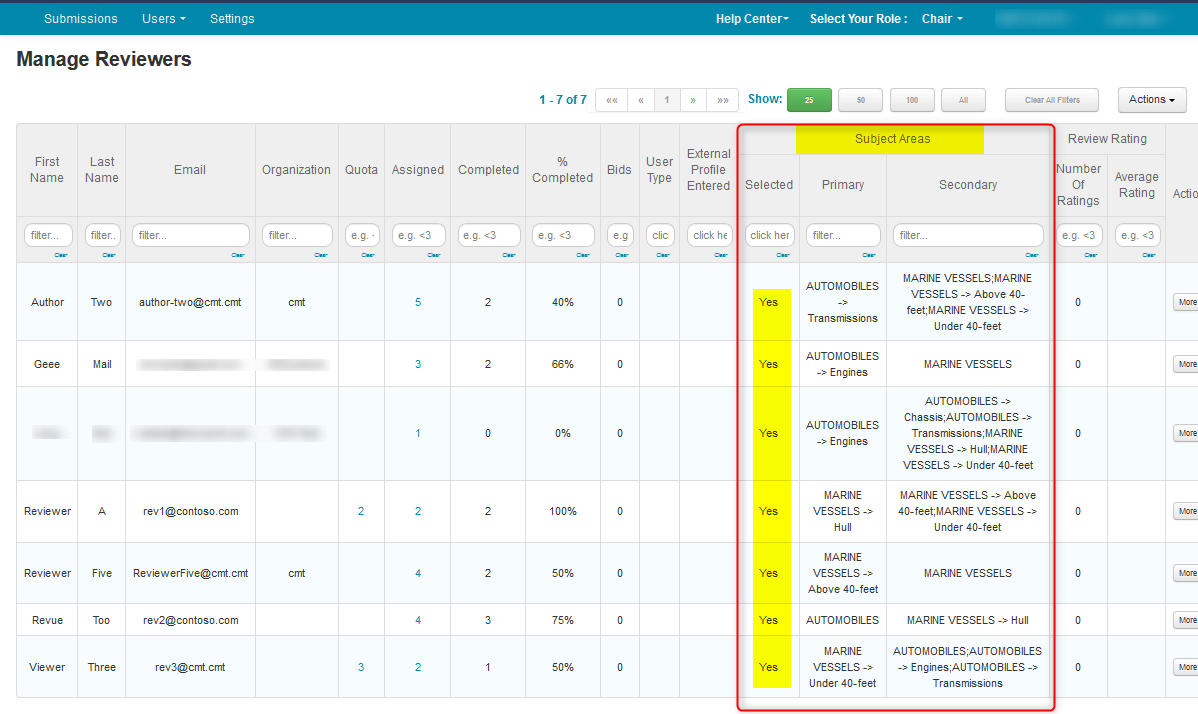
View Subject Areas
The Reviewers’ subject areas are viewable on the Manage Reviewer page. It is here you may see if they selected their subject areas and what they are.
Export Subject Areas
- The Reviewers’ subject areas may also be exported for offline viewing. Click ‘Actions’ then select ‘Export>Subject Areas.’

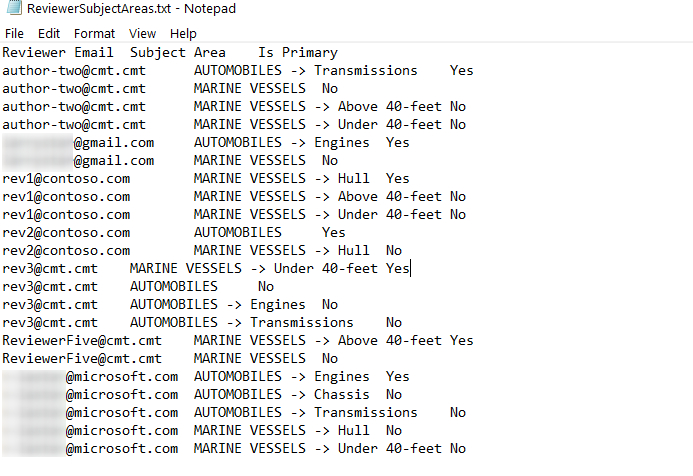
- Save the file locally
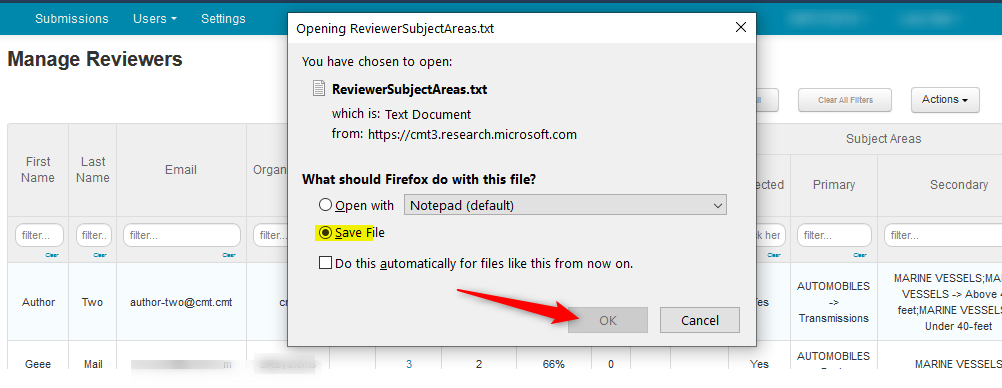
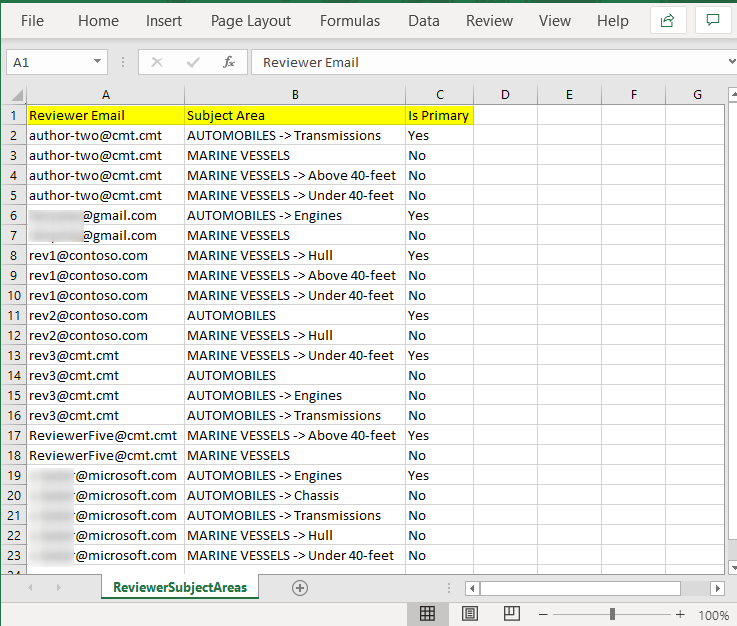
The file can be opened with either a text editor or Excel (as a tab-delimited text file).
Export Relevance Scores
Relevance scores can be exported as a text file.
- Click ‘Actions,’ then select ‘Export>Relevance Scores.’
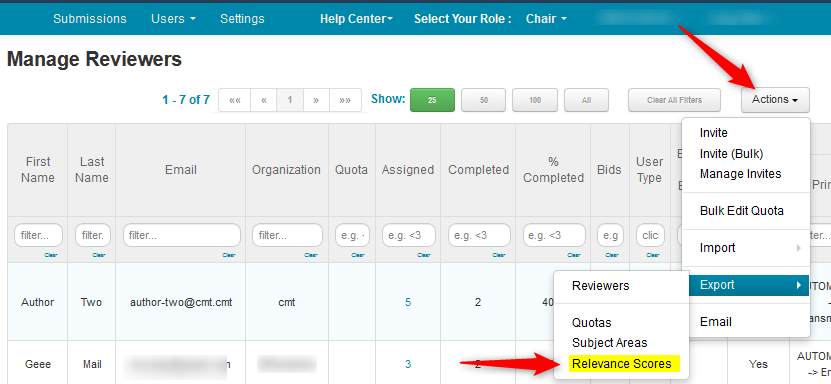
- Save the file locally.

- The file can be opened with either a text editor or Excel (as a tab-delimited text file).
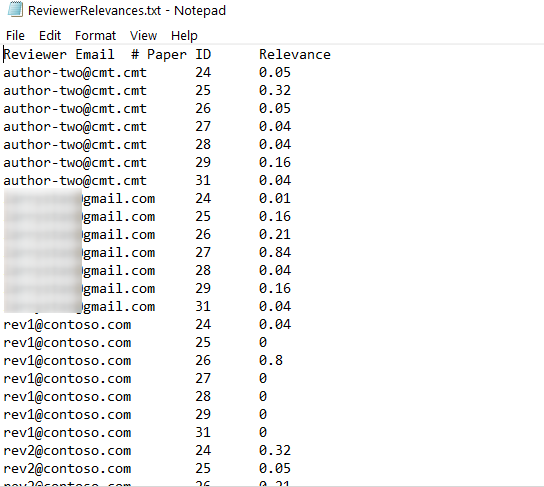
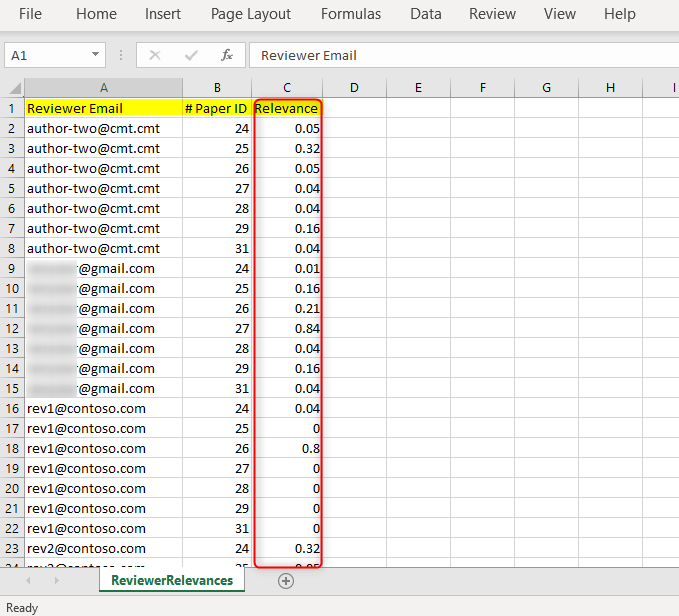
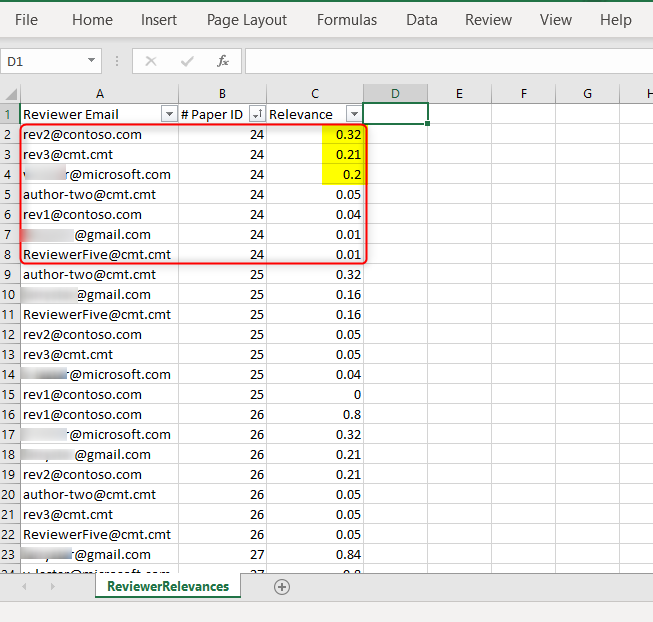
This file can be sorted by Paper ID to see the best candidates to Review a paper. In the example below, we can see the top 3 candidates for Paper ID 24.
HOW RELEVANCE SCORES ARE CALCULATED
Relevance takes into account overlap between subject areas (primary, secondary and hierarchical) provided by reviewers and authors for their papers as follows. Higher values of relevance denote better match between a reviewer and paper.
- Paper and reviewer exact match on Primary: pp1 (1 if match, 0 otherwise)
- Primary subject area of reviewer matches secondary subject area of paper: ps1 (1 if match, 0 otherwise)
- Primary subject area of paper matches secondary subject area of reviewer: sp1 (1 if match, 0 otherwise)
- Secondary subject area of reviewer overlaps with secondary subject area of paper: ss1 (1 if match, 0 otherwise)
- Parent of paper primary subject area matches primary subject area of reviewer:pp1h (1 if match, 0 otherwise)
- Primary subject area of reviewer matches parent of secondary subject area of paper: ps1h (1 if match, 0 otherwise)
- Parent of primary subject area of paper matches secondary subject area of reviewer: sp1h (1 if match, 0 otherwise)
- Parent of secondary subject area of reviewer overlaps with secondary subject area of paper: ss1h (1 if match, 0 otherwise)
Relevance = 0.80pp1 + 0.32pp1h + 0.16ps1 + 0.05ps1h + 0.16sp1+ 0.05sp1h + 0.04ss1 + 0.01ss1h